
How to do Code-First approach with Entity Framework Core and SQL LocalDB
If you have used Entity Framework, you have probably known that there are 3 possible approaches to work with the database:
- Database First
Database First is the most common practice when working an existing database.
In this case, an .EDMX (Entity Data Model XML) file will be generated when you map the database in your project. And it contains all the data models.
- Model First
With Model First approach, you start by creating .EDMX file with models in the designer, then you generate the database from the .EDMX file.
- Code First
With Code First approach, you create the data models firstly, and then generate or update the database with incremental migrations.
You have refined control on the details of data models, like the column constraints(max/min length), relationships etc.
And with the migration history, you can easily move forward or rollback your database version while ensuring the data model consistency.
Here I’ll use Code First approach to design, generate, and update my database with Entity Framework Core (EF Core) and SQL LocalDb.
1. Create SQL LocalDb file.
Go to “SQL Server Object Explorer -> SQL Server -> (localdb)\MSSQLLocalDB” in Visual Studio, right-click “Databases” and click “Create Database”.
Specify the database name and its path, and click OK.

Once the database is created, two files are created:
- LDF: is the Log Database File
- MDF: is the Master Database File

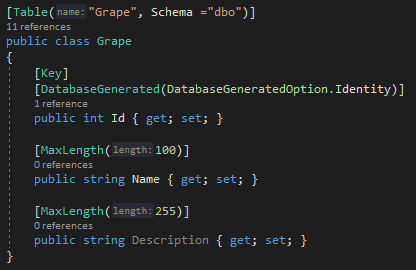
2. Create data model classes
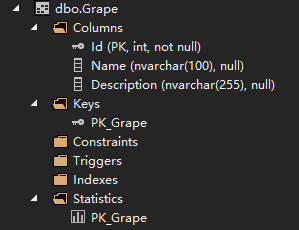
Create data model class “Grape” first with some basic properties like Id, Name and Description.
Id is primary key and auto incremented.
You can also see the its table name and schema name.
Note that the table name in the database could be different from the class model name.
Once the model is created, we should create the DbContext, which is the mapping of the database.
I’ll create a custom WineDbContext, and declare the Grape DbSet in it.
public class WineDbContext : DbContext, IDbContext
{
    public DbSet<Grape> Grapes { get; set; }
}
But it’s not finished about the WineDbContext, I need to initialize the connection to the database.
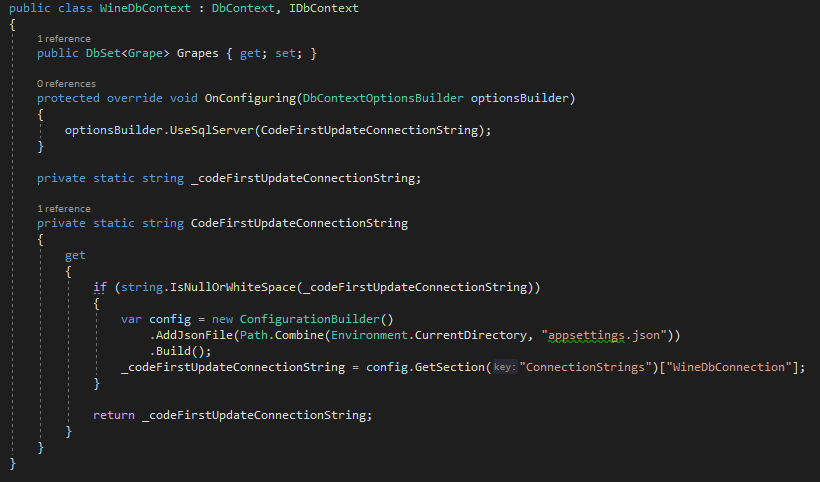
CodeFirstUpdateConnectionString retrieves the value from configuration file: appsettings.json
{
  "ConnectionStrings": {
    "WineDbConnection": "Data Source=(localdb)\\MSSQLLocalDB;Initial Catalog=[AbsoluteFolderPath]\\WINEDB.MDF;Integrated Security=True;Connect Timeout=30;Encrypt=False;TrustServerCertificate=False;ApplicationIntent=ReadWrite;MultiSubnetFailover=False"
  }
}
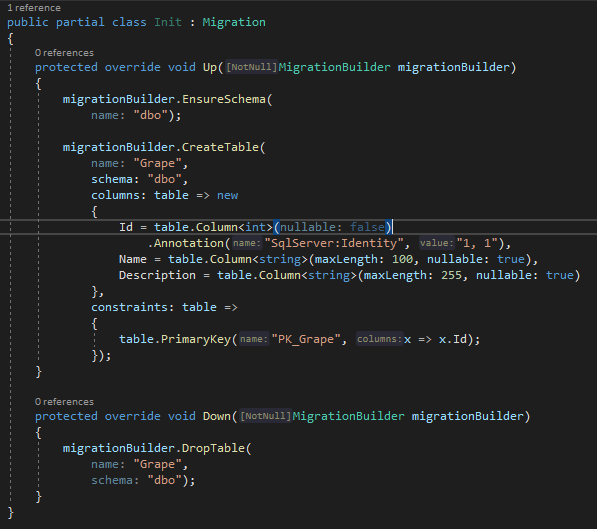
3. Create database migration
You need to install nuget package Microsoft.EntityFrameworkCore.Tools in the database project.

Go to “Package Manager Console”, and choose the database project as “Default project”, and create the migration with “Add-Migration” command.
Add-Migration Init

The generated class is the following.
You can see there are 2 methods: Up and Down.
Up contains the code will be executed when you run this migration against the database.
And Down contains the code will be executed when you rollback this migration.
4. Update database with migration
Once the migration is ready, you can update the database with it.
To update the database, you need the command:
Update-Database
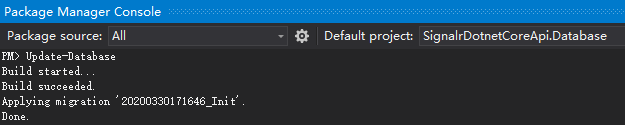
or specifically with the migration name:
Update-Database -Migration 20200330171646_Init

To debug your code, in case of error, when you execute the commands in Package Manager Console, you can use the following code:

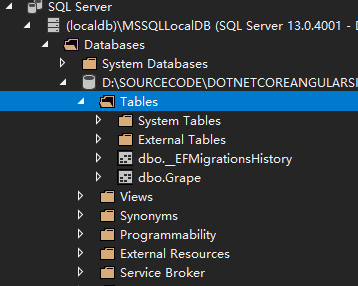
5. Check database
As the migration has beed executed against the database, let’s check the database.
You can see here are two tables:
- [dbo].[__EFMigrationsHistory]
- [dbo].[Grape]
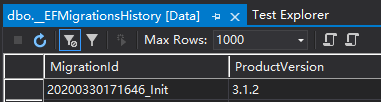
[dbo].[__EFMigrationsHistory] is the migration history table, it garantees the database consistency.
[dbo].[Grape] is Grape table.
Now we’ve seen the code first approach with EF core and SQL LocalDb.
You can see the source project: HERE